Knowledge Base

Certificate Installation: Plesk Panel 12+

Requirements for this installation : www_domain.crt and www_domain.ca-bundle
1. Log in to your Plesk Panel
2. Go to the Websites & Domains tab and select the domain you want to secure.

3. Click on ‘Secure Your Sites’
4. Select the SSL certificate that was created while generating the CSR code

5. On the next page locate the 'Upload Certificate Files' section. Click on the ‘Browse’ button and locate the certificate and the CA bundle files from your computer. After both files are chosen, click on ‘Send Files’.

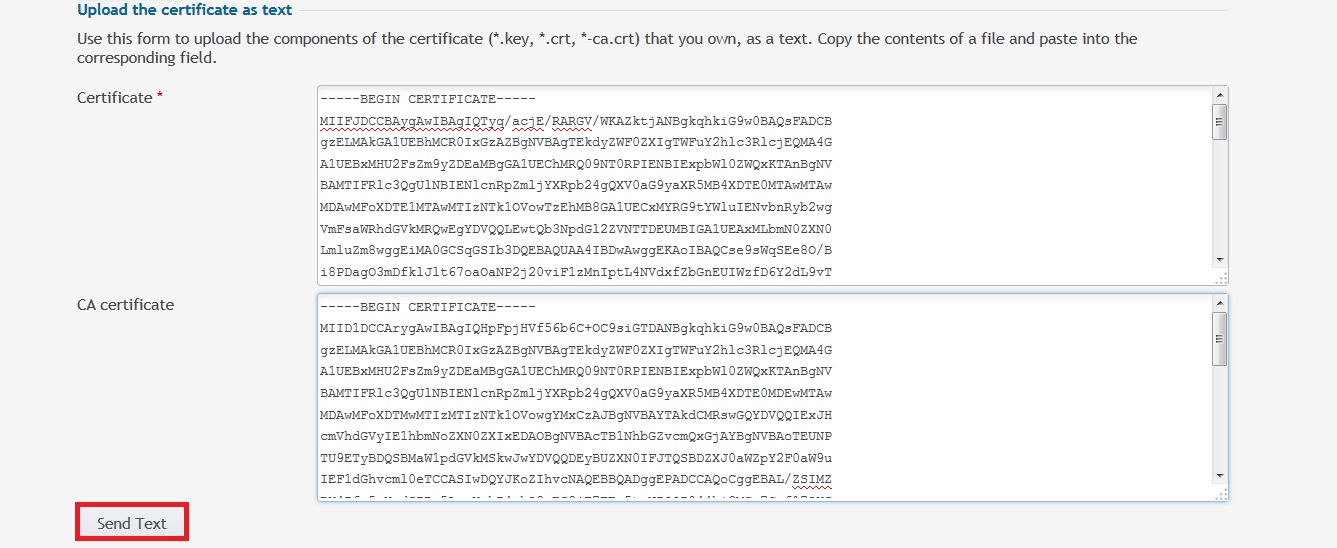
Alternatively, you can also copy and paste the certificate along with the CA bundle into the corresponding boxes under Upload the certificate as text and click on ‘Send Text’

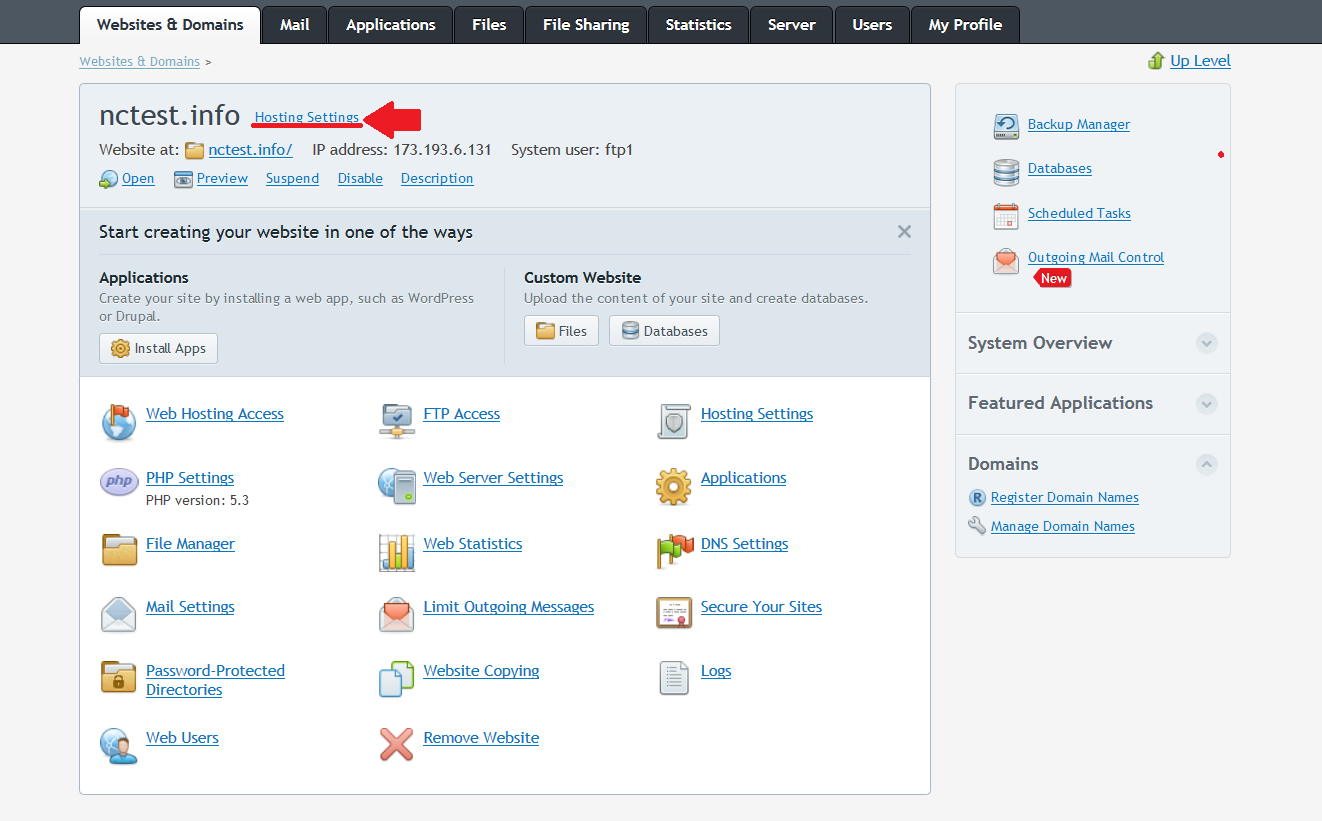
7. Return to the Websites & Domains tab and click on ‘Hosting settings’ link next to the domain name.

8. On the next page locate the Security section, select the certificate from the drop-down list and make sure that ‘SSL Support’ is checked.

9. Click ‘OK’ at the bottom of the page to save the changes.
Note: If your server is running Linux, stop and start the Apache process. If your server is running Windows, stop and start the IIS service. If you are unable to perform this or are uncertain the server type Plesk is running on contact your hosting provider for assistance.
- Plesk with Apache Web Server:
1. Click on Server on the left menu
2. Click on Service Management.
3. For the Web Server (Apache) service, click on the green icon. A restart will not work, you must do a stop then start.
- Plesk with Windows IIS Web Server:
1. Under Main Menu, click on Settings.
2. Under Applications, click on IIS Application Pool.
3. Click on Recycle.
10. Your SSL certificate is now installed and should be configured for its website. To verify, use Qualys SSL Server Test
Troubleshooting:
- Open a web browser and visit your site using https. It is best to test with both Internet Explorer as well as Firefox, because Firefox will give you a warning if your intermediate certificate is not installed. You should not receive any browser warnings or errors. If you immediately receive a browser message about the site not being available, then the server may not yet be listening on port 443. If your web request takes a very long time, and then times out, a firewall blocking traffic on TCP port 443 to the web server.
- If you receive a 'not trusted' warning, view the certificate to see if it is the certificate you expect. Check the Subject, Issuer, and Valid To fields. If the certificate is issued by Comodo, then the Intermediate certificate is not correctly installed.
Reference : http://download1.parallels.com/Plesk/Doc/en-US/online/plesk-administrator-guide/index.htm?fileName=68308.htm
